Setting Up Mastodon on a Raspberry Pi 4

I recently set up a Mastodon node on a Raspberry Pi 4 in my home. By and large, the process went smoothly, but I hit a couple of corner cases I wanted to document (both for myself and anyone else following this path in the future).
For the most part, I followed the admin setup guide provided by the Mastodon team. I had to deviate from it in terms of three pieces:
- Setting up the OS
- Setting up GMail as email server
- Setting up network access to the public internet with a Cloudflare tunnel
- Setting up SSH cert
Setting up the OS
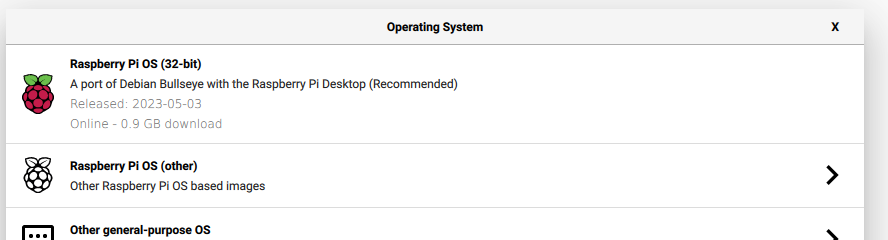
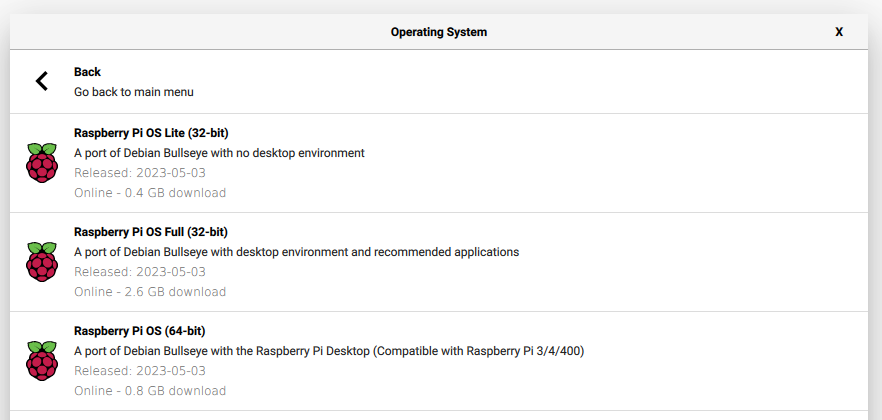
Before I could start anything, I had to install an OS for the Pi. Do do so, I used the Raspberry Pi imager, which also let me configure an initial wifi and login configuration (I’m doing this whole process headless, so I needed the Pi to immediately find the network and be SSH-ready).


Important step here: I needed to install the 64-bit Raspberry Pi OS here,
not the recommended 32-bit version. The Ruby install will attempt to build
components it needs, and it either incorrectly identifies the platform or doesn’t
have assembly code for the armhf architecture when it does that step.
Setting up GMail as email server
Since I use GMail for my email provider, I set up Mastodon to send outgoing
emails to GMail’s SMTP for proper routing. This wasn’t particularly difficult; I
just had to set up an
app-speicific password and
provide it during the setup wizard triggered by RAILS_ENV=production bundle exec rake mastodon:setup. The settings I used were
- smtp server: smtp.gmail.com
- port: 587
username:
password: authentication: plain OpenSSL verify mode: peer Enable STARTTLS: always
Important security note: The app-specific password is a static credential that could be stolen if an attacker gets into your Mastodon configs somehow. In an ideal world, it is not tied to a GMail account that could be used for nefarious purposes if someone gained control over it.
Setting up network access with a Cloudflare tunnel
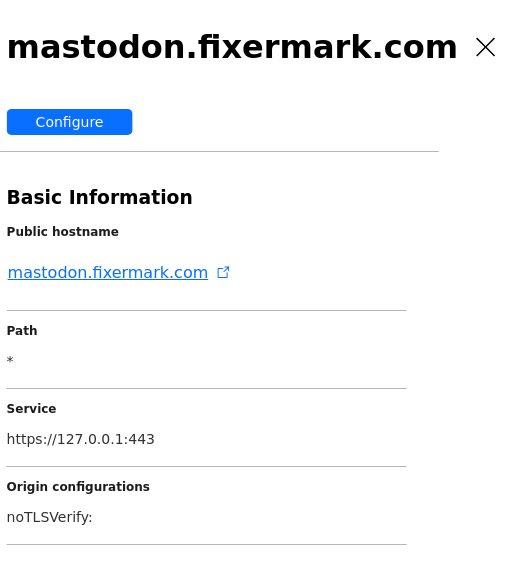
The one wrinkle in my plan is that I have a cheap Verizon home network with no static IP. Enter Cloudflare Tunnel, a frankly brilliant service they provide that involves running a daemon on your local machine to establish a connection to Cloudflare’s servers, which Cloudflare can then use to reverse-proxy external traffic to their public Internet servers back to your dynamic one. It took just a little bit of setup but was a pretty clean process:

-
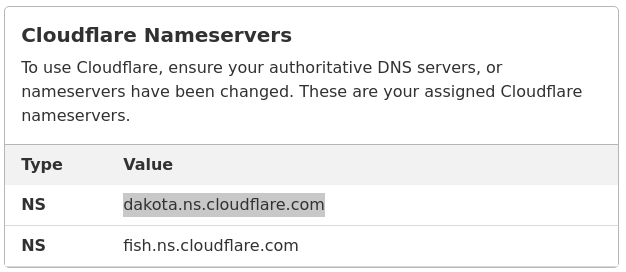
Shift DNS service of my domain names to Cloudflare: while I still have my domain names registered via another company, I told my regular host to use Cloudflare’s nameservers as the authoritative source for my DNS publication. This involved going into the dashboard on my Dreamhost account and just telling Dreamhost to use Cloudflare’s nameservers (in my case,
dakota.ns.cloudflare.comandfish.ns.cloudflare.com, but yours will vary). -
Create a new Tunnel configuration. This involves going to the Cloudflare dashboard, selecting
Zero Trust, then going toAccess -> Tunnels. Select “Create a Tunnel,” and that process will walk you through configuring a new tunnel (which includes downloading and installing the daemon on the machine you own (in my case, the Debian arm64 package).

- Once the tunnel is set up, and the connector is running on my local machine,
I set up a tunnel connecting Cloudlfare to the SSH port on my local machine. Here,
I did a bit of a risk-enhancing thing: I selected the
noTLSVerifyoption. This means Cloudflare is not checking that it has a good TLS certification to my Pi, and I could get man-in-the-middle attacked by my Verizon router or any other machine between me and Cloudflare. This is something to fix in the future, but it indicates that my TLS certs are misconfigured. Something to fix in the future.
Setting up the SSH cert
Even though my TLS is misconfigured, the certs still have to be present for the default
Mastodon config to try and host them. To set this part up, I looked in the nginx configs where
the certs are set up (in my case, /etc/letsencrypt/live/mastodon.fixermark.com/fullchain.pem and
/etc/letsencrypt/live/mastodon.fixermark.com/privkey.pem). I couldn’t figure out how to make the ACME
protocol work through the Cloudflare tunnel, so the setup step where we use certbot to generate
certificates had to get skipped.
Instead, I generated the certificates by going to Cloudflare’s dashbaord and
selecting my domain name, then SSL/TLS -> Origin Server. I generated an
RSA(2048) cert for the mastodon.fixermark.com hostname with an expiry of 15
years, then copied the cert and the private key into the fullchain.pem and
privkey.pem files.
This makes the Mastodon server happy, but doesn’t let me switch off the noTLSVerify option from
Cloudflare.
Conclusion
With these tweaks, I have a running Mastodon node that has been remarkably happy and healthy these past several days. One thing I like about Cloudflare tunnels in particular is they only expose the port you specify, so you have your server on the larger Internet without creating a massive attack surface that every script kiddie with a port scanner can beat against.
Do I need my own Mastodon node? Probably not. I like having full control, but I did this far more for “A Jedi builds his own lightsaber” reasons than actual need for this level of control. But I’m pleased to see that even in a slightly unusual configuration, Mastodon is perfectly content. Good work by the team making this so relatively easy to deploy.
Wish me luck understanding TLS though.
Comments