Creating a custom Shuffleboard plugin

Well, it’s off-season for the FIRST Robotics competition, which is always a good time to try new things. This year, I became more interested in Shuffleboard, which is one of the dashboard programs you can use to visualize telemetry from the robot on an attached laptop. Shuffleboard works by inspeting the shared Network tables that the robot and its control computer keep updated and drawing various user-defined widgets based on the values in the table.
One thing I noticed working with the team this year is that it’s hard to keep an eye on the board when in the middle of controlling the robot. So I’d like to help the team move some of the information coming in from the ‘board to other channels of sensory input so they don’t have to take their eyes off the field. To that end, I put together a custom plugin to play a sound when a boolean goes from false to true. Over these next several blog posts, I’ll detail how I got there.
The first part is converting the example widget provided with Shuffleboard into a new custom widget that we can modify. I’ll go step-by-step through my process, in the hopes other people can follow along when they want to create their own custom widgets. The end result is that we’ll have a second “example” widget wet up the way we want.
For all of this work, I’ve used the VSCode version bundled with wpilib 2022 as installed via the standard installation process.
Setting up the environment
Shuffleboard has an example widget in its project that we can use as the seed to build a new widget. To start, we’ll clone that widget and set up the environment so we can test it. For the purposes of these examples, I’m working on my sound widget so you can substitute reference to a “sound widget” with the widget you’re building.
- Go to the Shuffleboard project at https://github.com/wpilibsuite/shuffleboard and download it. Note If you use GitHub to back-up your projects, you should clone the project and download your clone; that’ll make it a lot easier to push your changes back to GitHub (and if your changes are published before competition season, you can use them on your robot!).
- create a new branch in Git (just generally good practice if you’re going to make big edits)
- copy
example-plugins/custom-data-and-widgetintoexample-plugins/sound-widget - in
example-plugins/sound-widget, renamecustom-data-and-widget.gradletosound-widget.gradle - edit
settings.gradleat the top of the project: addinclude "example-plugins:sound-widget" - edit
example-plugins/sound-widget/README.md:- Replace
./gradlew :example-plugins:custom-data-and-widget:installPluginwith./gradlew :example-plugins:sound-widget:installPlugin. This is a README so that change doesn’t alter how your program works, but it’ll make it easier for people reading to follow what you’re doing.
- Replace
- Test build: Run
./gradlew :example-plugins:sound-widget:installPlugin, and confirm the build succeeds. You should see a new jarfile dropped in~/Shuffleboard/plugins(note: I’m on Linux; your Shuffleboard directory on Windows isC:\Users\<your username>\Shuffleboard\plugins).
Note: Between tests, you’ll need to delete the
Shuffleboard/plugins/sound-widget-* file that gets created, because building
the example widget doesn’t delete previous example builds and if you end up with
two copies the newer ones don’t load correctly
Debugging tip
While going through this process, you may find that your plugin breaks. Shuffleboard generally doesn’t display errors when this happens, and by default, the scripts that launch Shuffleobard “swallow” errors so that they don’t get displayed anywhere.
To directly run Shuffleboard on the command line so you can see its standard output:
- cd to ~/wpilib/2022/tools
../jdk/bin/java -jar shuffleboard.jar
Whittling down to just a custom widget
The example widget creates not just a widget, but a whole new datatype for handling points. I don’t need that for the sound widget, so I’m going to remove it. Here’s the steps to whittle the example down to just an example of building a new widget. This widget will talk about Booleans instead of points; Boolean is built-in so we don’t need a new datatype to talk about them.
- In
example-plugins/sound-widget/src/main/java/com/example/simplewidget:- Go ahead and blow away the
datadirectory - edit
SimpleWidgetExamplePlugin.java:- Drop references to
PointType - Remove the override for
getDataTypes() - Remove the override for
getDefaultComponents()
- Drop references to
- edit
widget/SimplePointWidget.java:- Blow away references to
Point2D - Replace
dataTypes = Point2D.classwithdataTypes = Boolean.class - Replace
SimpleAnnotatedWidget<Point2D>withSimpleAnnotatedWidget<Boolean> - Comment out the contents of
initialize() - Delete the
xCoordinateViewandyCoordinateViewand the@FXMLannotations above them
- Blow away references to
- edit
src/main/resources/com/example/simplewidget/widget/SimplePointWidget.xml- Remove the two
Labelelements
- Remove the two
- Go ahead and blow away the
- Test build
- Test run
- we can run Shuffleboard manually by running
~/wpilib/2022/tools/shuffleboard.py(if you’re on Windows, just mentally replace~withyour home directorywhen you see it in this overview). - note: Shuffleboard won’t stay booted if there’s no robot code running to connect NetworkTables to, so to test you’ll need to run some robot code. You can write a real quick test code or use this demo and add some code into it to switch a boolean NetworkTable entry between true and false when you press and release a button.
- we can run Shuffleboard manually by running
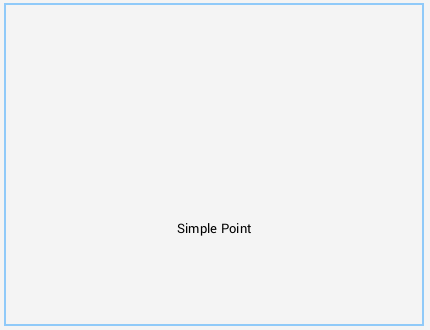
We should now bbe able to see a widget called Simple Point displayed in the widget picker, but there’s nothing there yet.

Changing to a custom sound widget
Now to make this ours. To start, we’ll make it act like a boolean widget. Later, we’ll add the ability to trigger a sound when the boolean changes to true.
For a lot of the work here, I’ll be renaming Java classes and variables. I highly recommend doing this using the “rename” code refactor in VSCode (usually bound to F2 when you select a variable name or class name), because it handles Java package names and places variables are used for you. It’s much harder to miss a rename if you let the tools do it for you.
-
Let’s rename everything to make it our own.
-
Under
example-plugins/sound-widget/src- Rename
main/java/com/example/simplewidgettomain/java/com/fixermark/soundwidget - Rename
main/resources/com/example/simplewidgettomain/resources/com/fixermark/soundwidget- under this directory, rename
SimplePointWidget.fxmltoSoundWidget.fxml, edit that file- replace
fx:controller="com.example.simplewidget.widget.SimplePointWidget"withfx:controller="com.fixermark.soundwidget.widget.SoundWidget"
- replace
- under this directory, rename
- Under
main/java/com/fixermark/soundwidget:- rename
SimpleWidgetExamplePlugin.javatoSoundWidgetPlugin.java. Edit this file:- VSCode should have corrected the
packagetocom.fixermark.soundwidgetfor you. - Change up the
@Description:group="com.fixermark"name="SoundWidget"version="2022.1.1"summary="A boolean widget that plays a sound when the state transitions from false to true"
- VSCode should have corrected the
- rename
widget/SimplePointWidget.javatowidget/SoundWidget.java. Edit this file:- Change up the
@Description:name="Triggered Sound"summary="Plays a sound when the monitored boolean goes from false to true
- Change
@ParameterizedController("SimplePointWidget.fxml")to@ParameterizedController("SoundWidget.fxml")
- Change up the
- rename
- Rename
-
Test build (remember to delete excess
~/Shuffleboard/plugins/sound-widget-jars first) -
Test run. You should see the name of the plugin changed.

There we go! Now that we have our own plugin, we can edit it to play sounds, which I’ll go over next time.
Comments